SS - Product Addons
Select product(s) to see addons appear.
This message only appears in theme editor.Welcome to MQS-Shop, your one-stop online store for metrology products and a UKAS accredited calibration laboratory No. 0373.
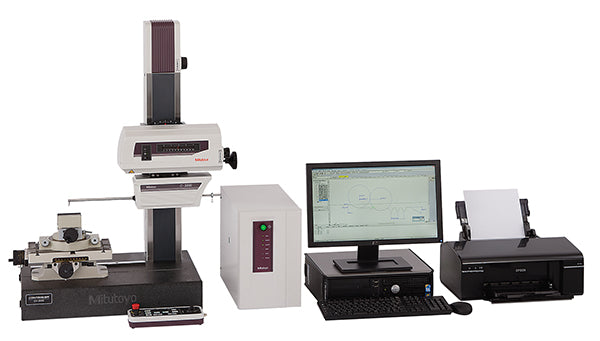
The CV-4500 Series features a built-in precision arc scale on the Z1 axis (detector) that allows the arc trajectory of the stylus tip to be read directly, minimizing the detector mechanism error and enabling precision, high-resolution measurement. On the X axis (driver) is a linear scale, allowing high-accuracy full-stroke measurement.
X axis (drive unit) : 80mm/s (MAX)
Z2 axis (column) : 30mm/s (MAX)
The total measurement time can be shortened by speeding up the traverse movements.
Accuracy ————————————————————————
Z1 axis (detector unit): ± (0.8 + | 2H | /100) μm
H = Measurement height from the horizontal position (mm)
X axis (drive unit): ±(0.8+0.01L) µm *1
L = drive length (mm)
Resolution ————————————————————————
Z1 axis (detector unit) : 0.02µm
X axis (drive unit) : 0.05µm
The one-step calibration kit supplied with the CV-4500 Series has been upgraded to enable easy calibration of the double-ended conical stylus featuring a contact on both the top and the bottom. Precise work such as calibrating the Z1-axis gain, symmetry, and stylus radius can now be carried out in a single operation.
The measuring force can be varied in 5 steps by using the software provided (FORMTRACEPAK), eliminating the need to adjust the measuring force by switching weights or through positional adjustment. The CV-4500 Series can also maintain the specified measuring force even when tilted.
Select product(s) to see addons appear.
This message only appears in theme editor.Free Shipping
Free shipping on orders over £250 (Subject to Terms & Conditions)
Satisfied or refunded
If your not fully satisfied with your purchase return the item with in 14 days for a full refund (Subject to Terms & Conditions)
Customer Support
Contact our customer support team via email or call our hotline number
Secure payments
We offer multiple secure payment options


